
Table of Contents
- What You'll Need Before Installing Custom Seat Covers
- Preparing Your Vehicle and Seats for Installation
- How to Fit Front Seat Covers Correctly
- Installing Rear Seat Covers Step by Step
- How to Make Seat Covers Fit Tight and Secure
- Seat Cover Installation Tools You'll Actually Use
- How Long Does Seat Cover Installation Take
- Common Installation Mistakes to Avoid
- Frequently Asked Questions
Last Updated: October 17, 2026
What You'll Need Before Installing Custom Seat Covers
To install custom seat covers, you don't need a garage full of tools, most beginners can handle it with basic items already at home. Having the right setup makes the difference between a smooth installation and a frustrating one.

Tools and Materials Checklist
Start by gathering these essentials:
- Flathead screwdriver (for prying headrests and trim)
- Phillips screwdriver (for any bolts or fasteners)
- Plastic pry tool or old credit card (protects your interior)
- Needle-nose pliers (helpful for routing straps under seats)
- Scissors or utility knife (for trimming excess fabric)
- Your custom seat cover set with all pieces
- Installation instructions (always included with quality covers)
- Flashlight or headlamp (you'll be working under seats)
- Patience and about 2-4 hours of uninterrupted time
Most of these items are optional, you can make do without the pry tool or pliers, but they genuinely help on a tight fit.
Safety Checks: Airbags and Seat Sensors
Before you touch anything, check your vehicle's airbag and sensor setup, the part most DIY guides skip.
Modern cars have side-impact airbags built into seat frames, and a cover that blocks them creates a safety hazard. Look for seams or markings indicating an airbag, and check your owner's manual for the exact location. Covers designed for your specific vehicle model account for these; if you're buying generic covers, measure carefully so the cover fits around airbag zones rather than compressing them.
Some vehicles also have occupancy or weight sensors under the seat cushion. Your cover shouldn't interfere with them, or you may get dashboard warning lights. Test your airbag warning lights after installation, if a new light comes on, remove the cover and check sensor placement.
Preparing Your Vehicle and Seats for Installation
Success starts before you touch the cover. Prep work takes about 20-30 minutes and prevents most common problems.
Park in a well-lit area with room to open all doors fully. Remove items from your seats, floor, cup holders, door pockets, and under-seat storage, then vacuum the seats thoroughly, debris under a cover creates lumps and uneven fit.
Adjust your seats to their lowest position and push them forward or back for maximum working space. Tilt the seat cushion up if your vehicle allows it to expose the underside where you'll route straps.

Most custom covers require removing the headrests temporarily. Locate the release button or lever at the base of each post, press, and pull straight up; if they're stuck, a gentle wiggle helps rather than force.
Lay out all cover pieces on a clean surface and identify which goes where. Quality covers label each section; if yours doesn't, check the instructions. Knowing the layout prevents installing pieces backward.
How to Fit Front Seat Covers Correctly
Front seats are where most beginners start, and they're actually the easiest part. Take your time here and the rest becomes straightforward.
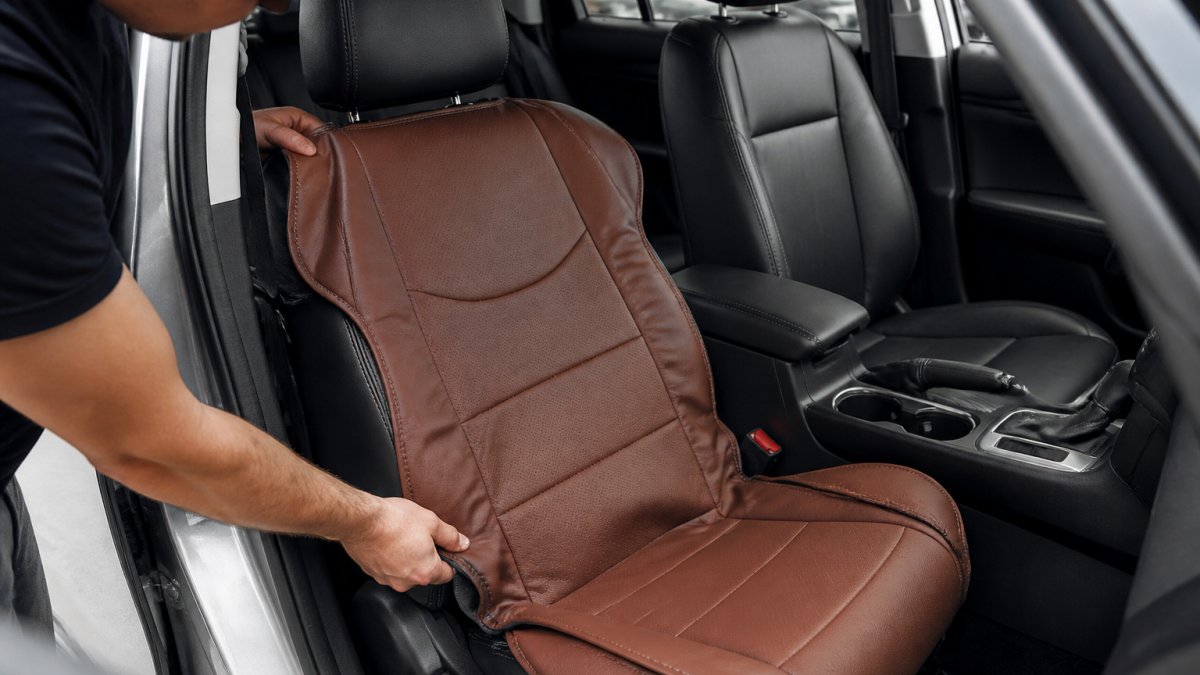
Start with the driver's side. Hold the front seat cover up so it drapes over the seat back with excess fabric hanging down, aligning the cover's seams with your seat's natural seams.
Tuck the cover firmly into the crevice between the seat back and cushion, working the fabric down evenly without wrinkles or bunches.
Work the side edges down and under the frame, smoothing wrinkles as you go. Pliers help here to grab fabric and pull it tight.
Removing and Adjusting Headrests
Headrests come off so the cover fits properly over the seat back. Find the release mechanism on the post, press the button or pull the lever, and pull straight up in one smooth motion. Set them aside safely, you'll reinstall them after the cover is secured.
If your cover includes dedicated headrest pieces, slide these on before reinstalling the headrests to keep the look finished and protect against wear.
Routing Straps and Elastic Beneath the Seat
Straps and elastic keep custom seat covers from shifting while driving. Look under your seat for metal frame parts and any factory straps or hooks, your cover's straps route under the seat and connect to these anchor points.
Pull the cover down under the seat as far as it goes, locate the straps on its underside (usually fabric strips with hooks or loops), and route each under the seat frame along the frame's natural path, avoiding sharp edges that could tear them.
Connect the straps to the anchor points, most modern covers use hooks that catch on the frame, some use elastic loops over frame posts; check your instructions. Pull each strap tight as you connect it: the cover should feel snug, not loose. Too tight shows wrinkles in the fabric; too loose means it shifts when you sit down.
Repeat for the passenger seat, the steps are identical, just from the opposite side.
Installing Rear Seat Covers Step by Step
Rear seats follow the same basic process as fronts, but the space is tighter and the angles are different.
Remove rear headrests if your vehicle has them, following the front process; if they aren't removable, work around them. Position the rear seat back cover over the seat back, tuck it into the crevice between back and cushion, and work the fabric down evenly on both sides.
Pull the rear cushion cover taut and tuck the front edge under the seat frame, rear cushions often have less overhang than fronts, so you may have less fabric to work with. The tricky part is the gap between the rear seat and the back of the vehicle; your cover needs to fit into this space without bunching.
Fitting Covers Over Seat Backs and Cushions
The seat back is the most visible part of your rear seat cover. Position it evenly across the full width, aligning with the seat's natural contours and following any curve or angle.
Smooth from top to bottom, pushing out air pockets as you go, rushing here creates wrinkles that are hard to fix later. Then pull the side edges around the seat frame and tuck them under firmly; the cover should feel tight but not stretched to distortion.
Car Accessories for MINI Cooper R50 R53 HATCHBACK R55 Clubman R56 R57 CABRIO →
Connecting Hooks and Fasteners Securely
Rear seat covers use the same strap-and-hook system as fronts, but rear seats often have fewer anchor points. Route the straps under the seat frame along the natural path, some go forward under the seat, others backward toward the trunk.
Connect each strap to its anchor point and pull tight, then test by pushing on the cover; it shouldn't move or shift. Some vehicles have factory hooks or loops for seat covers, if you can't find them, check your owner's manual or the installation guide.
How to Make Seat Covers Fit Tight and Secure
A tight fit is about technique, not strength. Work systematically from one end of the cover to the other rather than tightening everything at once.
For front seats, start at the top of the seat back: pull taut, tuck, move down a few inches, repeat to the bottom for even tension. Do the same on the cushion, starting at the front edge and working backward.
Pull each strap tight before connecting so the cover feels snug against the frame, no shifting when you press on it, but no distortion of the seat's shape either. Common mistake: over-tightening. If the fabric wrinkles or puckers, back off until it lies smooth. Test by sitting down and shifting your weight; the cover shouldn't slide or bunch up.
Seat Cover Installation Tools You'll Actually Use
You don't need much to install custom seat covers, most people have these tools already.
A flathead screwdriver is the most useful: use it to pry headrests free and tuck fabric into tight spaces without tearing it. Needle-nose pliers grab fabric and pull straps through tight spaces under the seat. A plastic pry tool protects your interior from scratches, an old credit card or plastic spoon works too, since metal tools can damage trim and upholstery. Scissors trim excess fabric around edges or openings. A flashlight or headlamp gives hands-free light for working under seats.
That's genuinely all you need, fancy tools don't make the job easier.
How Long Does Seat Cover Installation Take
Installation time depends on your vehicle, the cover complexity, and your experience level. For most vehicles, expect 2-4 hours total, beginners closer to 4, experienced installers 2-3. Front seats take about 1-2 hours and rear seats another 1-2; trucks take longer due to larger surface area, compact cars are quicker, and heated or massage seats require extra care around those features.
Don't rush, taking your time prevents mistakes. Break it into stages: prep (20-30 minutes), front seats (1-2 hours), rear seats (1-2 hours), with a break between stages.
Common Installation Mistakes to Avoid
Most problems come from rushing or skipping prep work. Here's what to watch out for.
Not vacuuming first. Debris under a cover creates lumps and uneven fit.
Forgetting to remove headrests. Fitting a cover over an installed headrest creates wrinkles and poor fit.
Under- or over-tightening straps. Loose straps let the cover shift; over-tightened ones wrinkle the fabric. Aim for snug but smooth.
Not routing straps correctly. Follow your installation guide and route straps under the frame in the paths designed for them.
Forcing covers that don't fit. Check compatibility before buying, measure your seat and compare to the cover dimensions.
Skipping the airbag check. Make sure your cover doesn't interfere with airbags or sensors.
At Munk'Goods, we understand that getting the right fit matters.
We offer covers for popular vehicles including the Mini Cooper series and Fiat Toro, with options in environmentally friendly leather and other durable materials. Our Car Seat Cover Leather Front Auto Seat Cushion Covers start at $171.85 and provide the protection and style upgrade you're looking for. For Mini Cooper owners, our specialized covers are priced at $287.60 and include both front and rear seat coverage with easy installation in mind.

Installation becomes straightforward when your covers are designed for your specific vehicle.
Installing custom seat covers is a project most car owners can handle in an afternoon.
Frequently Asked Questions
How do you know if custom seat covers are compatible with your car before buying?
Check your vehicle's make, model, and production year against the product listing. Verify seat configuration (bucket seats, bench seats, split backs), headrest style, and side airbag placement. Many retailers, including Munk'Goods, recommend contacting customer service with photos of your seats before ordering. Measure your seat dimensions and compare them to the cover specifications. Vehicle-specific fit information should be detailed on the product page, if it's vague, ask before purchasing to avoid ordering the wrong size.
Can seat covers interfere with side airbags or seat sensors?
Quality custom seat covers are designed to work around side airbags without obstruction. However, you must verify compatibility before installation. Check if the cover has cutouts or reinforced seams aligned with airbag deployment zones. Seat sensor compatibility depends on cover material and fastening method, fabric and leather covers typically don't interfere if installed correctly. If your vehicle has advanced seat sensors for occupancy detection, confirm the product listing states compatibility. When in doubt, test the cover fit before final tightening and ensure no material blocks sensor areas.
How long does it typically take to install custom seat covers?
Front seat covers usually take 30-60 minutes per seat for beginners, depending on seat complexity and fastener type. Rear seats often require 45-90 minutes due to tighter access and more routing points. Total installation for a full set ranges from 2-4 hours for first-time installers. Experienced installers typically finish in 1-2 hours. Vehicles with split-fold rear seats or complex seat configurations take longer. Having all tools ready, watching installation videos beforehand, and following the included instructions carefully reduces time significantly.
Do you need special tools to install custom seat covers?
Most custom seat cover installations require only basic tools: a screwdriver (Phillips and flathead), pliers, and possibly a trim removal tool to access fasteners without damage. Some covers use hooks or clips that don't require tools. A flashlight helps with under-seat work. Munk'Goods seat covers come with detailed instructions specifying which tools you'll need for your specific model. Check the product listing before ordering, if specialized tools are required, they're usually mentioned. For most DIY installations, household tools are sufficient; specialized automotive tools are rarely necessary.